
Both of these looks can change the tone of your digital stamps from the classic black into something amazing and unique. The brownish tones of Sepia are often suggestive of olden day photos, giving an aged and more neutral appearance, excellent in works where you want a softer look without harsh black line. Where as the palest grey allows for that "no lines" effect which I am always amazed to see and eager to one day learn.
Upon reading Pat's Tutorial I realised that it was a wonderful blog, but it was for an older version of Microsoft Word then I owned. So INSPIRED by Pat, I decided to make my own quick tutorial, using my version to share with you all.
To access the alternate instructions previous created by Pat, please follow the link provided to her blog HERE!!!
TUTORIAL!: Microsoft Word 2010
*Please note: I have not done a tutorial before so BE GENTLE!!! LOL... but also, as some people may never have used Microsoft Word to work with pictures I will start from the very beginning as if you do not know how to use the program at all. Feel free to skip ahead!!*
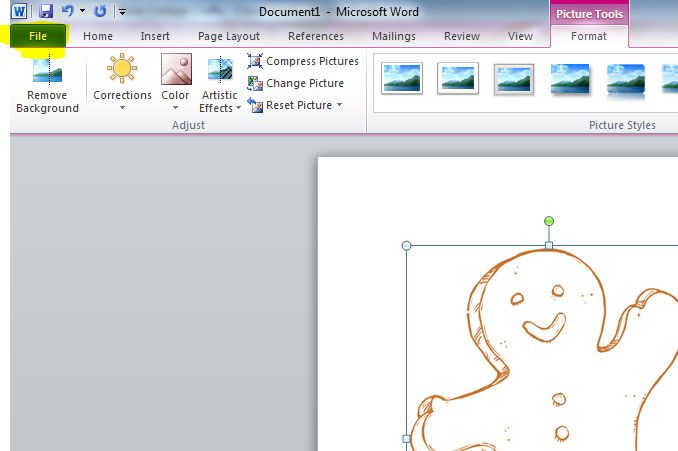
Open Microsoft Word 2010. A Blank page will open up with a tool bar across the top. As you can see in the picture provided the tool bar is divided into 8 Main Tabs, and then each of these tabs provide you with individual options. For this project you will need to select with your mouse the Insert Tab, as highlighted in yellow.
Under the Insert Tab are many options most of which we are going to ignore!!! LOL... All you want is the one that says Picture, also highlighted in the image provided.

Pressing the picture button should open up to your computer files. HOPEFULLY!!! :) you have them in some kind of reasonable order, where you can just pick the file you would like to open. :) For todays tutorial I have used Gingerbread Man! by Mo Manning available HERE!!
Once you have selected you file, press Insert.

TAAAADDDDAAAAA!!!!!!! It should come out looking like this. The box around your image allow you to re-size your image!. Just hold your mouse cursor over a corner circle, click the left mouse button, hold and drag to your desired size. This is ONE of the great features of using digital stamps over rubber stamps. The versatility in there use. Using the corners to change the sizes maintains the images original dimensions.

Now that you have re-sized your image...Or not!! it's time to format the image to change those colours. Now when you added your image to the page, Microsoft Word 2010 should have already changed the Main Tabs at the top from the 'Insert' tab, to the 'Format' tab... But if it didn't, or if you have gotten lost along the way, that is what you need to press on now... The 'Format' tab which is the last Main Tab in the row of tabs across the Main toolbar!
Now for the fun part! Most of the option under format we can ignore for now, but Microsoft Word 2010 is a fun program, and you should come back another time and have a play with your images, now you know how to insert a digi and re-size and access the Format Tab in Microsoft Word 2010. For now you need to press on the third icon across 'Colour'. This opens up a drop down box as shown below.

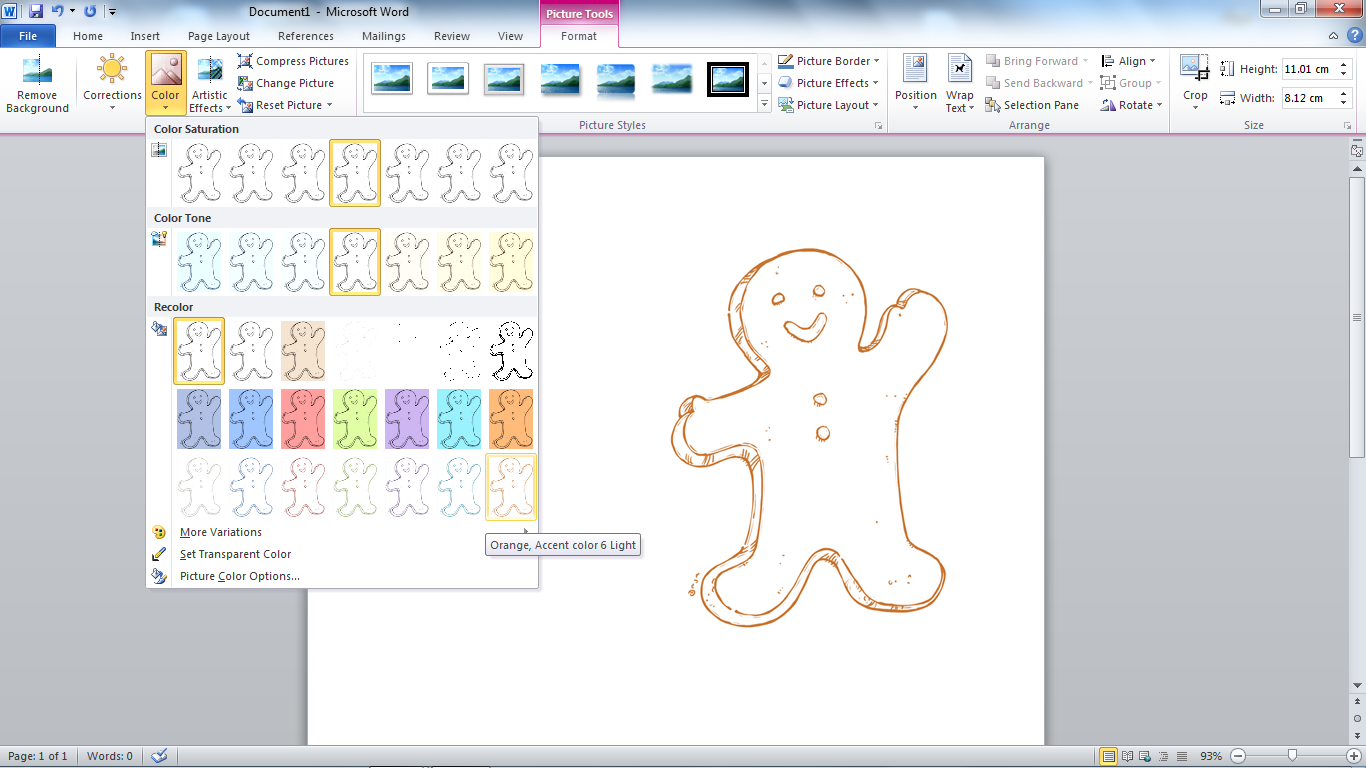
Now I've move my little Gingerbread Man! over so you can see him better! As you move your cursor over the different options in the drop down box you will notice your image change colours as well! See there are three different options to change under Colour... the Colour Saturation, Colour Tone and Recolour. For this Tutorial we ONLY want to change the Recolour Option.
To achieve the palest grey tone for the 'No Lines' technique you need to select the 'Washout' selection. This is the 4th Recolour icon on the top from the left. I have selected it in the photo below but it's a bit hard the see. *sorry, my program chucked a spaz and wouldn't let me highlight it!!*
It is quite pale grey, but is visible when printed out, perfect for No lines!!!

To format your image to sepia choose the last Recolour icon on the bottom right. As you can see in the picture below, once selected the label "Orange, Accent colour 6 Light" comes up. While the label says orange it does appear more brownish than orange when printed, fitting the sepia look. While there is an icon called Sepia (the third from the left) please ignore this icon. This changes the BACKGROUND only!!! and of course we are wanting to change the lines.
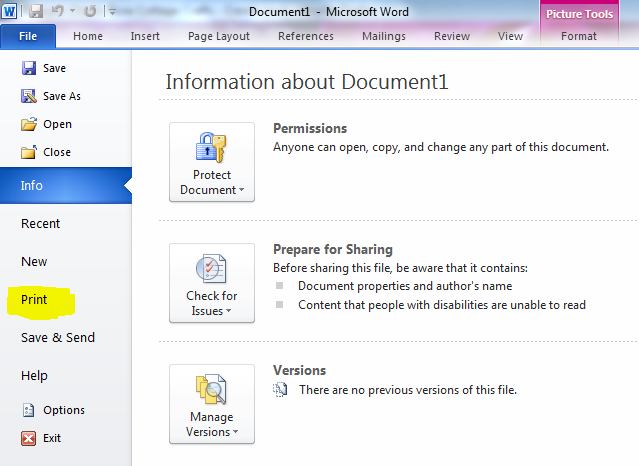
Of course there are many different options under Recolour that you can play around with! Just have fun!! Now that's it for the colouring. Back to basics for a second. To finish this lovely image of course you want to print it!!! To find print, press on the 'File' tab, as highlighted below. *yes I got the Dang thing working again!!*
Select 'Print' Tab from the Side Toolbar!!
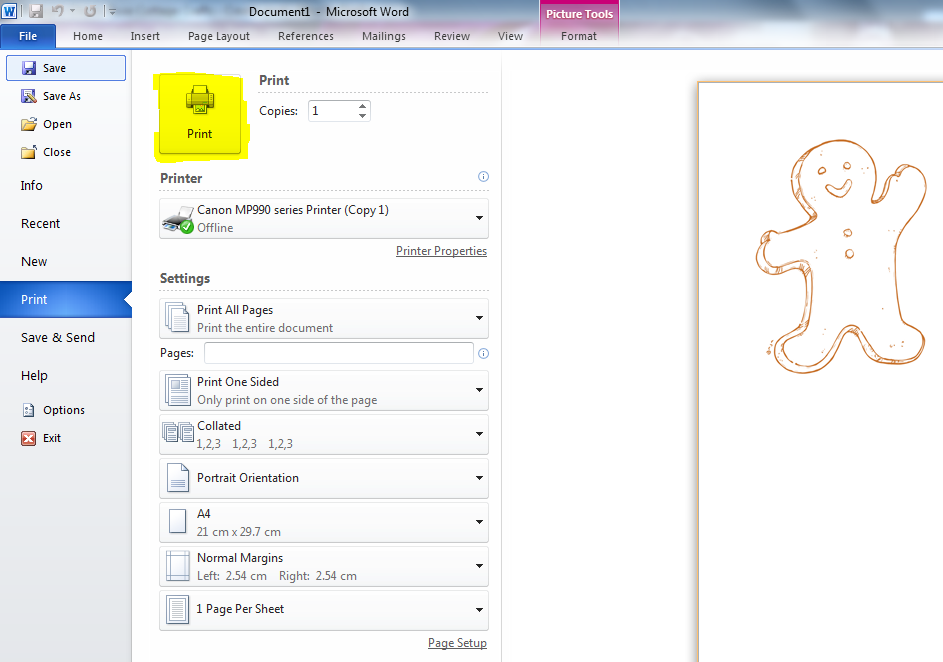
Check over all your printing details! These will be specific to YOUR printer, but the layout should look similar!!! Make sure you leave the options on RGB Colour printing!!! or else all that recolouring you did might just print out in GREYSCALE!!! and press the Print button!!! I've highlighted it below in yellow!!
and last but not least!!!! Check that you have replaced your empty COLOUR INKS!!!! in your printer recently. Or else like me, you'll go through ALL of this effort. to now have to wait till pay day to print it out! :( BIG FAT SAD FACES!!!
LOL
Well I hope this helps you all out!
Once again a BIG thank you to the LOVELY Pat Frank whom inspired this post... If your Microsoft Word is an earlier version, check out her blog instructions HERE!!! and have a look around her blog while your there. She is an amazingly talented woman!!
Thanks for visiting!! and happy formatting!!
Xo
This is FABULOUS Amanda!!!! You have a gift for writing tutorials!!! Beautifully done, girlfriend! Hugs, Pat Frank
ReplyDeleteThank you for this great tutorial! I look forward to learning so much more from you.
ReplyDeleteIrene
Great tutorial Amanda....thanks!
ReplyDeleteGreat job Amanda! Thanks for the easy to understand tutorial. Hugs, Carol
ReplyDeleteYour tutorial was very informative. So easy to understand.
ReplyDeleteJust yesterday, I was thinking that I would like to change the color of the lines, but had no idea as to how to do it. Now I can. :)
Mari